The safest way to learn how to install septic tank riser is to find the tank, check its condition, and choose parts that fit. A careful homeowner may do light digging and basic setup. Damaged lids, unsafe soil, buried utilities, or unknown openings need help from a septic professional.
Table of Contents
- Can a homeowner install a septic tank riser?
- What is a septic tank riser and why install one?
- What should you check before installing a septic tank riser?
- What tools and materials do you need to install a septic tank riser?
- How do you safely expose the septic tank lid?
- How do you measure and prepare the septic tank opening?
- How do you install and seal a septic tank riser?
- How should you backfill and finish around the riser?
- What can go wrong when installing a septic tank riser?
- When should you call a septic professional after installing a riser?
- Frequently Asked Questions
- Key takeaways
- Conclusion
Can a homeowner install a septic tank riser?
A homeowner may install a septic tank riser when the tank is easy to find, the opening is strong, and the work area is safe. The job still needs care. The riser must stay level, fit the tank opening, and keep soil and rainwater out.
A riser is a vertical access section placed above a septic tank opening. It brings the lid closer to the ground. This makes future inspections and septic pumping easier. It also means less digging when the tank needs service.
When the project may be suitable for a careful homeowner
This project may suit a careful homeowner who follows the product guide. The tank should have a known location and a solid opening. The work area should also be clear, dry, and kept away from children and pets.
A homeowner may safely do light digging, measuring, cleaning, and simple site work. The homeowner should stop if the soil is loose, the lid is cracked, or the tank material is not clear. Septic tanks can hold harmful gases. Never leave an open tank alone.
You do not need a professional for every small task. Finding records, marking the area, cleaning the lid, and checking measurements may be safe when done carefully. A professional is needed when the tank or work area presents a danger.
When to hire a septic professional instead
A professional should handle the work when the tank is hard to find or the opening is damaged. Help is also wise when the tank is near a driveway, building, wall, or drainage area. Local rules may require approved parts or a trained installer.
Septic Tank Service Dallas helps Dallas property owners review tank access and plan safe service. The team can help locate the tank, check the lid, and plan septic system work. A trained worker may notice damage that is easy to miss while digging.
What is a septic tank riser and why install one?
A septic tank riser is a pipe-like extension between the buried tank opening and a lid near the surface. It does not replace the tank. It also does not change how wastewater is treated. Its main job is to make inspection and service access easier.
A septic system collects wastewater from a home or building. The tank separates solids, liquids, and scum. The liquid then moves toward the drainfield. Because the tank holds waste and gases, its lid must stay secure and sealed.
How risers improve access for inspections and pumping
A riser can make the tank easier to find before septic pumping. It may reduce digging during routine work. Easier access can help a technician inspect the tank, lid, baffles, and walls more closely.
A riser does not remove the need for regular care. Watch for slow drains, sewage smells, wet ground, or plumbing backups. The right service schedule depends on household use, tank size, waste levels, and system design.
Choosing compatible riser, lid, and safety components
The riser, lid, seal, and fasteners must work together. Parts should match the tank opening and the soil around it. The lid should resist movement and leave no opening where a child or animal could fall.
Tanks may be made from concrete, plastic, fiberglass, or other materials. Each kind may need a different connection method. A part made for one tank may not seal well on another. Read the product guide before removing soil.
What should you check before installing a septic tank riser?
Before installing a riser, confirm the tank location, tank material, opening size, and site safety. Start with any records you have. A permit, drawing, inspection note, or old service record may show the tank and drainfield.
The tank is not always straight behind the house. Inlet and outlet pipes may point in different directions. When records are missing, a professional locator may be needed. Learning how to find a septic tank before digging can prevent damage.
Finding the tank and confirming its construction
Mark the likely tank area and use careful hand digging near the lid. Heavy equipment may crack the tank or harm buried pipes. Never force a stuck, broken, or heavy lid.
Some tanks have more than one access point. A large opening may serve the main tank. A smaller opening may sit near an inlet or outlet. The riser must go over the correct opening. Guessing may limit future service access or harm parts inside the tank.
Checking local requirements, utilities, and site conditions
Have underground utilities marked before digging. Also look for irrigation lines, buried wires, roots, and drainage paths. Public utility marking may not show private lines, so those may need a separate check.
Septic rules differ by location. Check with the local health office or permit office when the lid or ground surface will change. Dallas properties can have different soil, slopes, and access needs. A plan that works in one part of Dallas may not suit another.
What tools and materials do you need to install a septic tank riser?
The needed parts depend on the tank and riser system. The basic set often includes a matching riser, secure lid, seal, and approved fasteners. Follow the product guide when choosing sealant and hardware.
Do not use scrap boards, loose rocks, or an indoor cover. They may move, leak, or fail under soil pressure. A septic lid must stay stable while still allowing trained workers to remove it later.
Essential riser, lid, seal, and fasteners
The riser should fit the opening without forcing the tank wall. The lid should match the riser size and have a safe fastening system. The product may require a gasket, compression seal, or approved sealant.
Useful supplies may include clean bedding material, spare fasteners, marking paint, and a temporary barrier. Keep the opening covered whenever work stops. Keep all parts clean so soil does not enter the tank.
Excavation, measuring, leveling, and safety equipment
A shovel, hand trowel, tape measure, level, soft brush, and clean cloth can help. Wear gloves, eye protection, and sturdy shoes. A dust mask may limit contact with dry soil. A helper can make lifting safer.
Never enter the tank or lean over the opening. Septic tanks may hold dangerous gases. You cannot judge the air inside by smell alone. Stop if the excavation is deep, narrow, wet, or unstable.
How do you safely expose the septic tank lid?
The safest way to expose a septic tank lid is to mark the area, dig slowly, and keep heavy tools away. Remove soil in thin layers. Hand digging gives better control near the lid, tank wall, and pipes.
Set a clear boundary around the work area. Keep children, pets, and visitors away. Never leave the opening uncovered during a break, even for a short time.
Marking the work area and digging carefully
Mark the expected lid location and leave enough room to work around the riser. Set grass, mulch, and topsoil aside for later use. Keep loose soil far enough away that it cannot fall into the opening.
Stop when the lid edge appears. Check for cracks, movement, smells, water, and loose soil. Do not use a damaged lid as a work surface. If the tank is deeper than expected, stop and review the plan.
Cleaning and inspecting the tank opening
Clean the lid and nearby surface with a brush. Do not push dirt into the tank. Look for a firm rim, an even surface, and signs of old leaks.
Do not enter or disturb the tank. A professional can inspect inside with proper tools. If wastewater is near the lid, the tank is overflowing, or strong smells are present, cover the area safely and arrange service.
How do you measure and prepare the septic tank opening?
Good measurements are important before choosing or installing a riser. Measure the opening at several points. Check whether it is round, square, uneven, or damaged. Match the riser to the real opening, not just the old lid.
The finished lid should be high enough to avoid surface water. It should also sit low enough to fit the yard. Height depends on the ground, slope, landscaping, and product design.
Measuring the opening and determining riser height
Record the opening width, shape, rim condition, and distance below the planned ground level. Use a level to check whether the rim is even. Measure twice before buying or cutting parts.
A tall riser may need more outside support. A short riser may become buried after soil settles. The lid should stay easy to reach without becoming a trip hazard. Future pumping equipment must also reach the access point.
Preparing the surface for a watertight connection
The connection surface must be clean, firm, and free from loose concrete, soil, grease, and standing water. Damaged concrete may need repair first. A broken rim can let groundwater enter the tank.
Install the seal exactly as the product guide says. Some systems use a gasket. Others use a safe sealant or mechanical connection. Do not mix materials unless the maker says they work together.
How do you install and seal a septic tank riser?
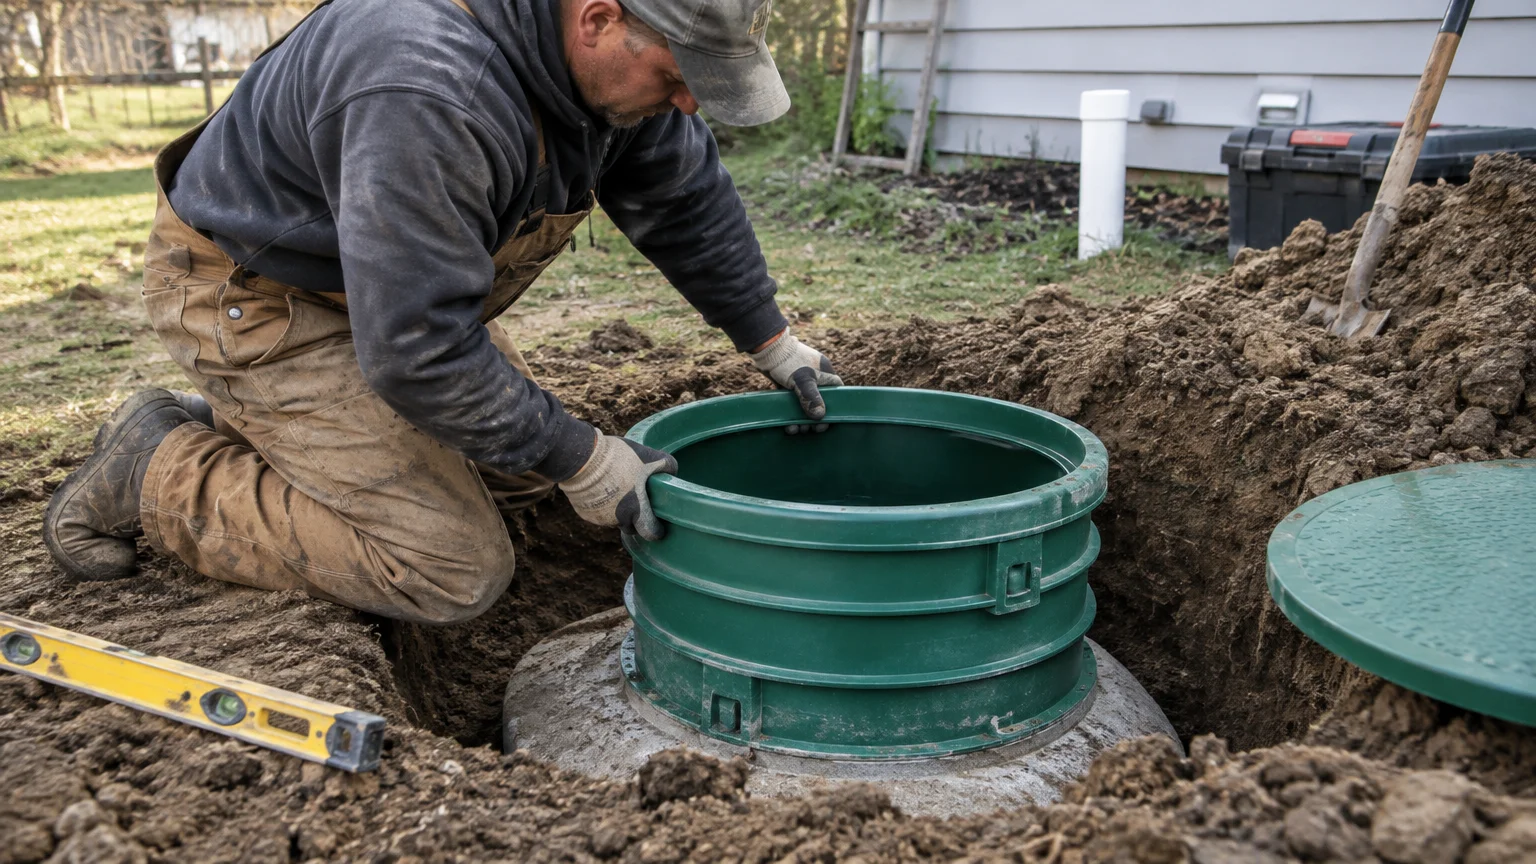
To learn how to install septic tank riser, center it over the prepared opening, keep it level, secure it correctly, and fit the matching lid. The assembly should not move when touched. A good seal keeps soil, rain, and runoff away from the tank.
Use clean hands and clean parts. Dirt on the seal may leave a small gap. A gap can let water enter or gases escape near the lid.
Positioning and securing the riser
Lower the riser carefully without scraping the tank rim. Keep its sides straight and its top level. Install fasteners in the order shown by the product guide. Apply even pressure around the connection.
Do not over-tighten the fasteners. Too much force can crack plastic, strip hardware, or harm concrete. If the riser does not sit evenly, stop. Do not use loose blocks or shims unless the maker allows them.
Fitting the lid and checking the seal
The lid should sit fully on the riser and stay secure during a gentle test. Fasteners should prevent movement but still allow a trained worker to remove the lid. The lid should not rock, bend, or leave a clear gap.
A visual check cannot prove that the joint is watertight. Watch for movement, pooling water, or soil washing toward the lid. A septic professional can review a doubtful connection before the area is covered.
How should you backfill and finish around the riser?
Add backfill slowly and evenly around the riser. This supports the assembly without pushing it out of level. Keep large rocks, broken concrete, and sharp debris away from the riser and seal.
Use suitable soil in small layers. Press each layer gently by hand or with a light tool. Do not drive heavy equipment over the tank or riser unless the system was built for that load.
Backfilling without shifting or damaging the assembly
Check the riser level after each layer. Add soil on opposite sides to keep pressure balanced. If the riser moves, stop backfilling and find the cause.
The final surface should send water away from the lid. Low spots may collect rain and send water into the tank. Do not pile soil high enough to bury the lid or block future access.
Protecting the lid from traffic, water, and landscaping
Record the riser location in property records and a simple yard plan. This helps prevent later digging or planting. Do not place deep-rooted plants, sheds, decks, or driveways over the tank or drainfield without guidance.
Keep vehicles, trailers, and heavy equipment away from the lid. A visible marker can help family members and future owners find the access point. Septic Tank Service Dallas can help property owners plan access for future inspections and septic pumping.
What can go wrong when installing a septic tank riser?
Common problems include a poor fit, an uneven riser, a weak lid, and a leaking seal. Rainwater may enter the tank. Soil may wash into the opening. The lid may move when someone walks nearby.
A riser may also reveal a larger problem. The tank could have a cracked top, broken inlet, damaged outlet, or unsafe cover. Installing a new riser without fixing that damage may leave the system unsafe.
Common problems with leaks, alignment, and unstable lids
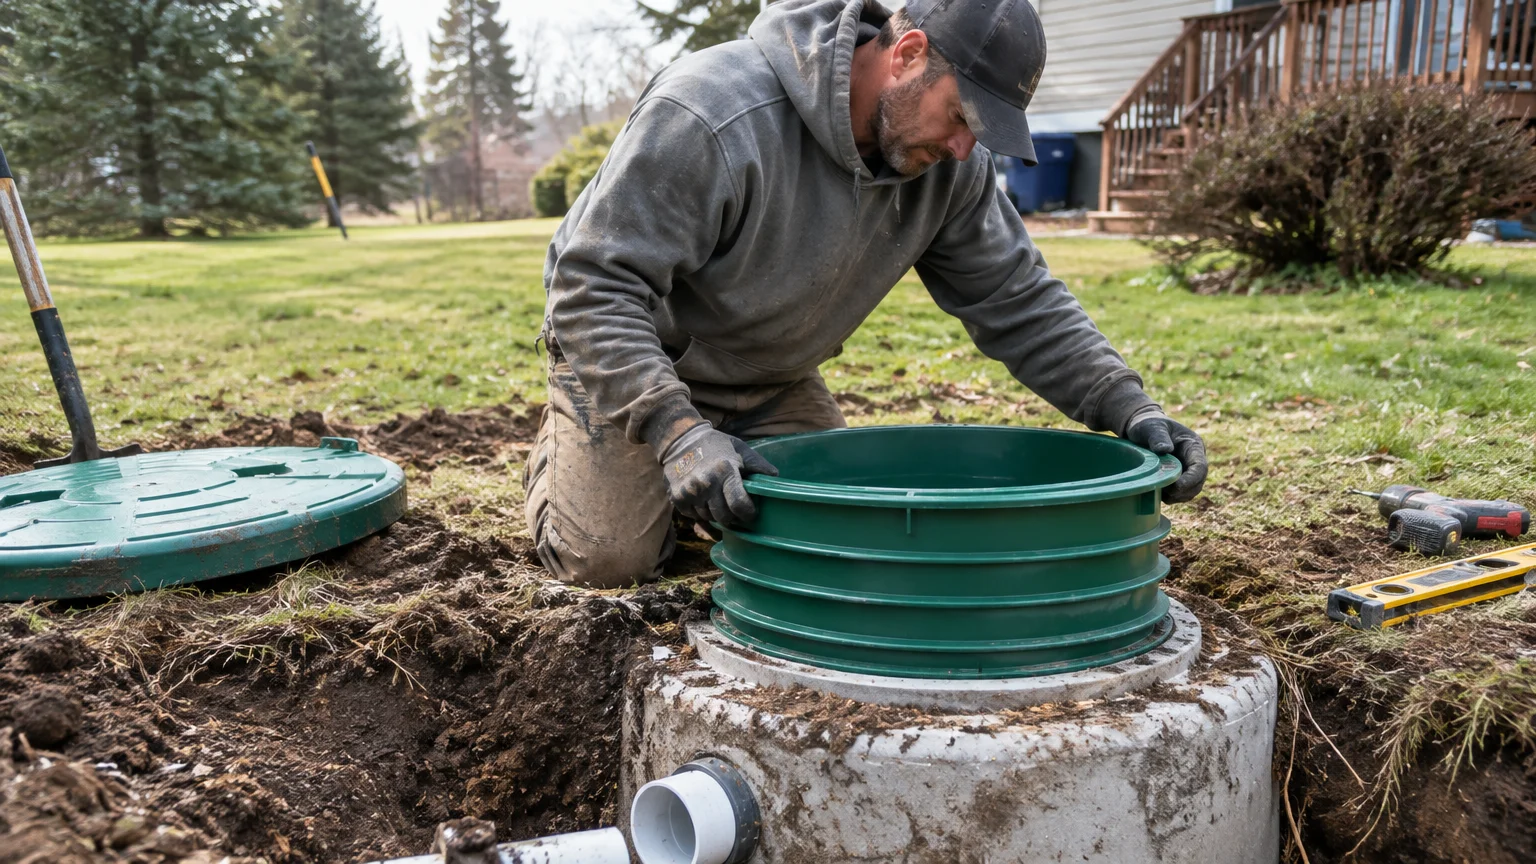
A crooked riser can strain the lid and seal. A dirty or badly fitted seal may let groundwater enter. An unsecured lid can create a fall danger. Fix these problems before treating the work as complete.
Look for standing water after rain, wet soil near the joint, bad smells, shifting parts, and lost soil. These signs do not prove one cause. They do show that the installation needs a closer review.
How poor access or tank damage can affect the system
A riser that is too small may make inspections hard. A riser over the wrong opening may hide the main service point. A buried or blocked lid can delay septic pumping and make urgent work harder.
Tank damage may let wastewater escape or groundwater enter. Both issues can affect system use. If drains slow, toilets gurgle, sewage backs up, or the yard stays wet, get professional help instead of guessing.
When should you call a septic professional after installing a riser?
Call a septic professional when the riser shifts, the lid will not seal, or water gathers around the joint. Help is also needed when the tank location is uncertain, the tank is damaged, or the opening is unsafe.
A professional can review the work, check the tank, and explain the next step. This may include septic pumping, checking baffles, looking at pipes, or fixing the access assembly.
Signs the installation needs inspection or correction
The following signs need attention:
- A lid rocks, lifts, or will not fasten safely.
- Soil or water moves into the tank opening.
- Strong smells come from the riser after closing the lid.
- The riser leans, cracks, or pulls away from the tank.
- Wastewater, slow drains, or wet ground appear nearby.
- The opening is too deep, unsafe, or hard to reach.
Keep people away from a damaged opening. A temporary barrier can help, but it is not a lasting repair. Explain the problem clearly when arranging service.
Planning future pumping, inspections, and maintenance access
A good riser makes future service easier, but it does not replace care. Keep the riser location, tank records, and service notes together. Tell new owners and tenants where the tank is located.
The right schedule depends on the system and property use. More residents, frequent guests, or a garbage disposal may require closer watching. A professional can explain warning signs and when septic pumping may be needed.
Frequently Asked Questions
How deep should a septic tank be before a riser is installed?
There is no one correct depth for every tank. The riser should bring the lid near the finished ground. It must also keep the lid safe from water and traffic. Tank depth, soil, slope, and local rules all matter.
How far does a septic tank need to be from a house?
Setback rules vary by local law, soil, tank type, and property layout. The tank also needs safe access and space from foundations, wells, utilities, and drainage features. Property records and the local health office can help confirm the layout.
Can a homeowner install a septic tank riser without pumping the tank?
Sometimes, but check the tank condition first. A full tank, broken lid, or wastewater near the opening can make work unsafe. Pumping may also make inspection easier. A professional can decide whether service should come first.
Who performs a septic inspection after a riser is installed?
A qualified septic professional usually performs the inspection. They may check the riser, lid, seal, opening, inlet, outlet, and site. Local rules may state who can perform an official inspection. Keep the record with other septic papers.
Does installing a riser replace regular septic tank pumping?
No. A riser improves access, but it does not remove solids from the tank. Pumping needs depend on the tank, household use, system design, and sludge level. Better access can make future service and inspections easier.
Key takeaways
- Match the riser and lid to the tank opening.
- Do simple measuring and cleaning only when the site is safe.
- Get help for utilities, unstable soil, damaged lids, or tank cracks.
- Keep the riser level, sealed, secure, and clear of surface water.
- A riser improves access but does not replace inspections or pumping.
Conclusion
Learning how to install septic tank riser starts with safety, careful measurements, and matching parts. Expose the tank slowly, prepare a firm connection, secure the lid, and backfill without moving the riser. Pause when the tank, soil, seal, or local rules are uncertain.
Septic Tank Service Dallas helps property owners review septic access across Dallas. Contact us to arrange help with a riser inspection, septic tank pumping, or a safer long-term access plan.